Step 1 Start a new job
To start validating your records in a batch job, we are starting a Record Validation Job.
- Navigate to the Record Validation Job page.
- Click 'Add New Job'.
- At 'Job Name', enter a name for your job.
- At 'Select Object', select the object you want to start a Record Validation Job in.
- At 'Validations', select what you want to validate. Choose between Address, Country, Email and/or Phone.
Note: You can define a set of fields (e.g. Address fields) or a single field (Phone) at the Record Validation Setup. The Record Validation Job will only validate fields that are defined in the Record Validation Setup. - At 'Include', decide what records you want to include in the Record Validation Job. If you want to make sure that all records are taken into account, simply select all Record Validation statuses.
New - All records that Record Validation did not validate before.
Changed - All records that were changed since the last validation.
Manual - All records that were manually validated by users.
Red - All records that Record Validation was not able to validate before because of unusable data.
Amber - All records that Record Validation has validated suggestions for.
Green - All successfully validated records. - Decide if you want to add a filter to your job. By adding a filter, you can run the validation on a subset of your records.
- Start the job.
Note: Validating records cost credits. Make sure all settings are correct before starting a Record Validation Job.
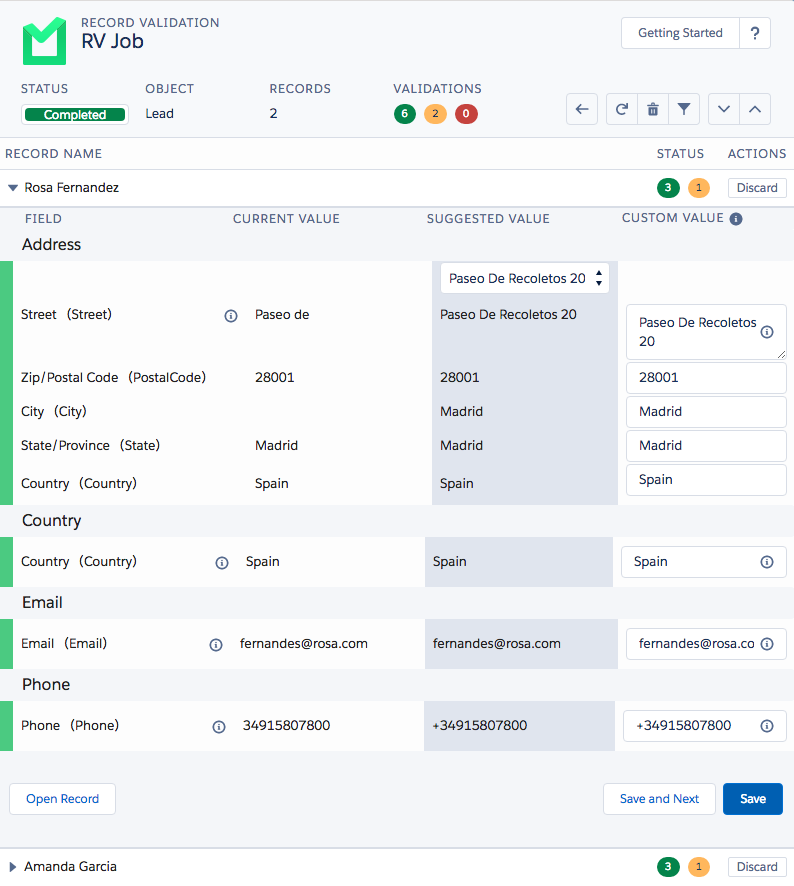
Step 2 Open results and process validations
After your job finishes, you can open up your results.
Select the values you want to save in the record. Choose between the suggested validated value from RV or enter your custom value that can be also validated upon entering. The fields that are highlighted will be kept.