Step 1 Duplicate Check Live for standard objects
- The first step is to locate the API name of the custom Object you wish to use. Find the list of API's here. For this example, we will use 'Opportunity'.
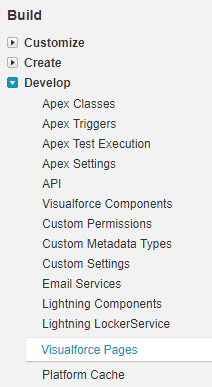
- Next is to create a Visualforce page for the Duplicate Check Live feature. Navigate to Salesforce Setup, then under 'Build' click the arrow next to 'Develop' and choose 'Visualforce Pages'. Example image:
- Click the 'New' button:
.png) .
. - At 'Label' enter "DC Live", at 'Description' enter 'Duplicate Check Live feature'.
- Check the checkbox 'Available for Lightning Experience, Lightning Communities, and the mobile app'.
- At 'Visualforce Markup' field, enter the following code. Make sure you replace *API_NAME* with the API name you find at step 1.
<apex:page standardController="*API_NAME*" docType="html-5.0" sidebar="false" showHeader="false">
<script>
    if ((typeof sforce != 'undefined') && (sforce.one != null)) {
        sforce.one.navigateToURL('{!URLFOR($Page.dupcheck__dc3Layout,null,['id' = Id])}');
    } else {
        window.location.href = '{!URLFOR($Page.dupcheck__dc3Layout,null,['id' = Id])}';
    }
</script>
</apex:page>
This is what the Visualforce page configuration should look like with Opportunity as an example: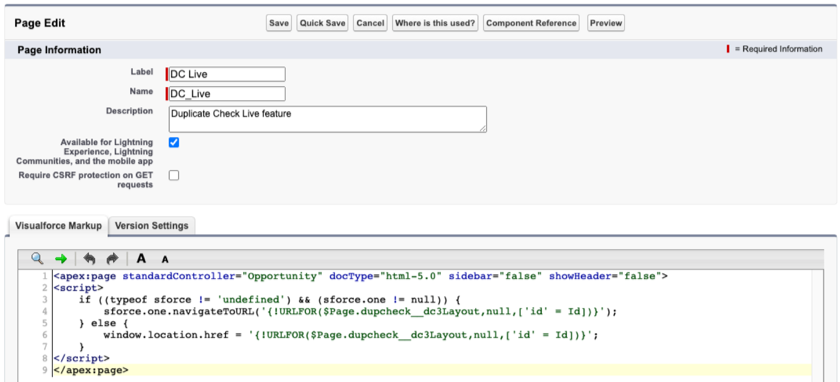
- Click 'Save'.
Step 2 Add Duplicate Check Live to a standard custom object
- Navigate to Salesforce Setup. Under 'Build' choose 'Customize'.
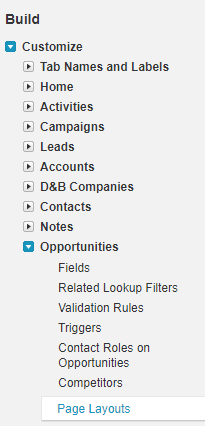
- Click on your 'Standard object' and then choose 'Page Layouts'. In this example we choose 'Opportunity'.
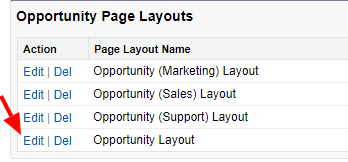
- Click 'Edit' in front of 'Your standard object layout'. In this example 'Opportunity layout'. Example image:
- In the menu, scroll down to the 'Visualforce Pages'. Drag and drop a 'Section' at the top of the Page layout.
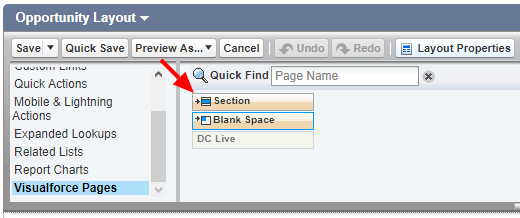
- Use the settings specified in the example image below:
.png)
- From the 'Visualforce Pages' drag and drop the 'DC Live' component to the section that we just added. Example image:
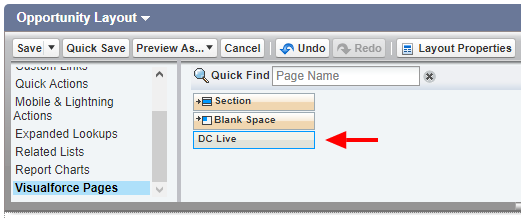 Click here to watch a short video of how to add DC live to your page layout in Salesforce Classic.
 - Move your mouse over the 'DC Live' Visualforce page. At the end of the Visualforce page, click on the button to edit its properties. Example image:
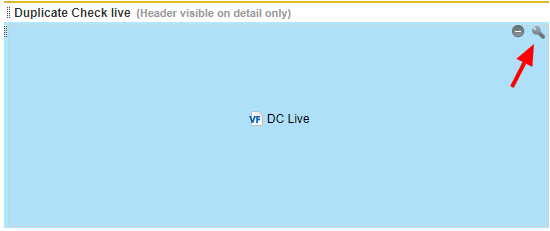
- Use the properties specified in the example image:
.png)
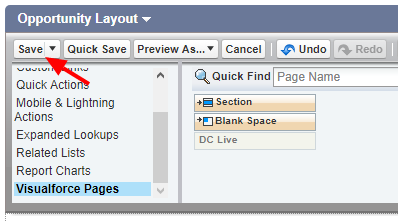
Now make sure to 'Save' everything done until now. Image Example:
Step 3 Apply DC Live feature to the scenario of your Standard Object
- Navigate to the DC Setup page, then click on your 'Standard Object'.
- Navigate to the Object scenario tab and make sure that you have applied a scenario to DC Live. Check the example image below.
.png) That's it! If you want to use DC Live in 'Cross object' mode and make it find duplicates in different objects, make sure you activate Cross Object and apply a scenario to the DC Live feature in every Object you wish to use in the DC Live feature.
That's it! If you want to use DC Live in 'Cross object' mode and make it find duplicates in different objects, make sure you activate Cross Object and apply a scenario to the DC Live feature in every Object you wish to use in the DC Live feature.
