1. Log in
- Start DC Local by double-clicking it in its installation folder.
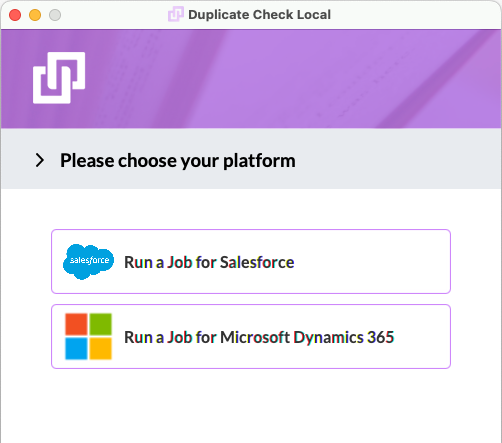
- Select the platform you want to use. To start a job from your Salesforce Org, select Run a Job for Salesforce.
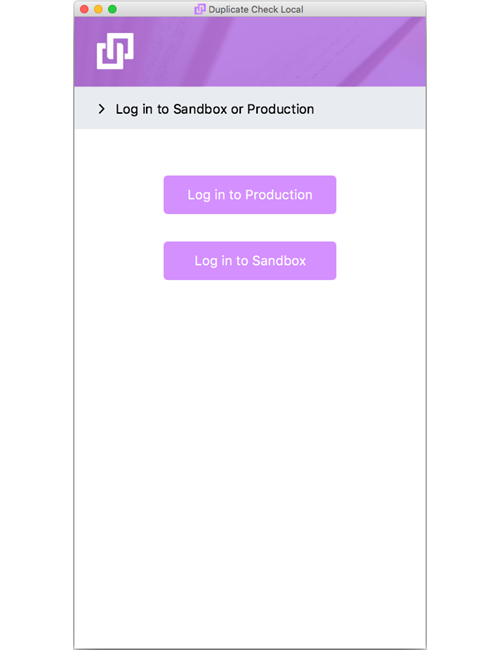
- Choose to log in to Sandbox of Production, depending on where you will create the DC Job.
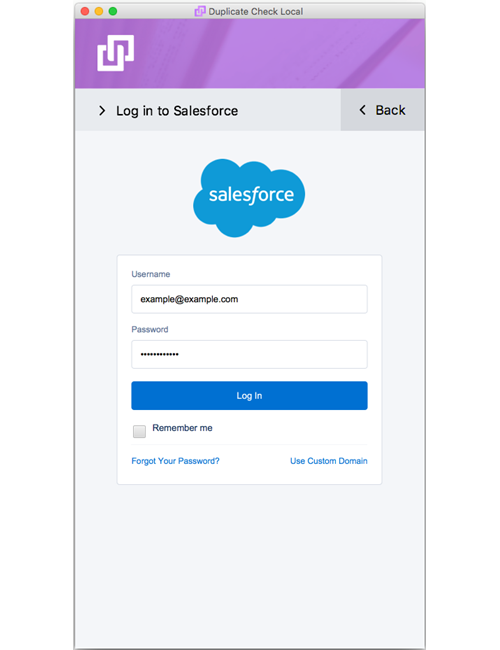
- Use your Salesforce credentials to login into DC Local.
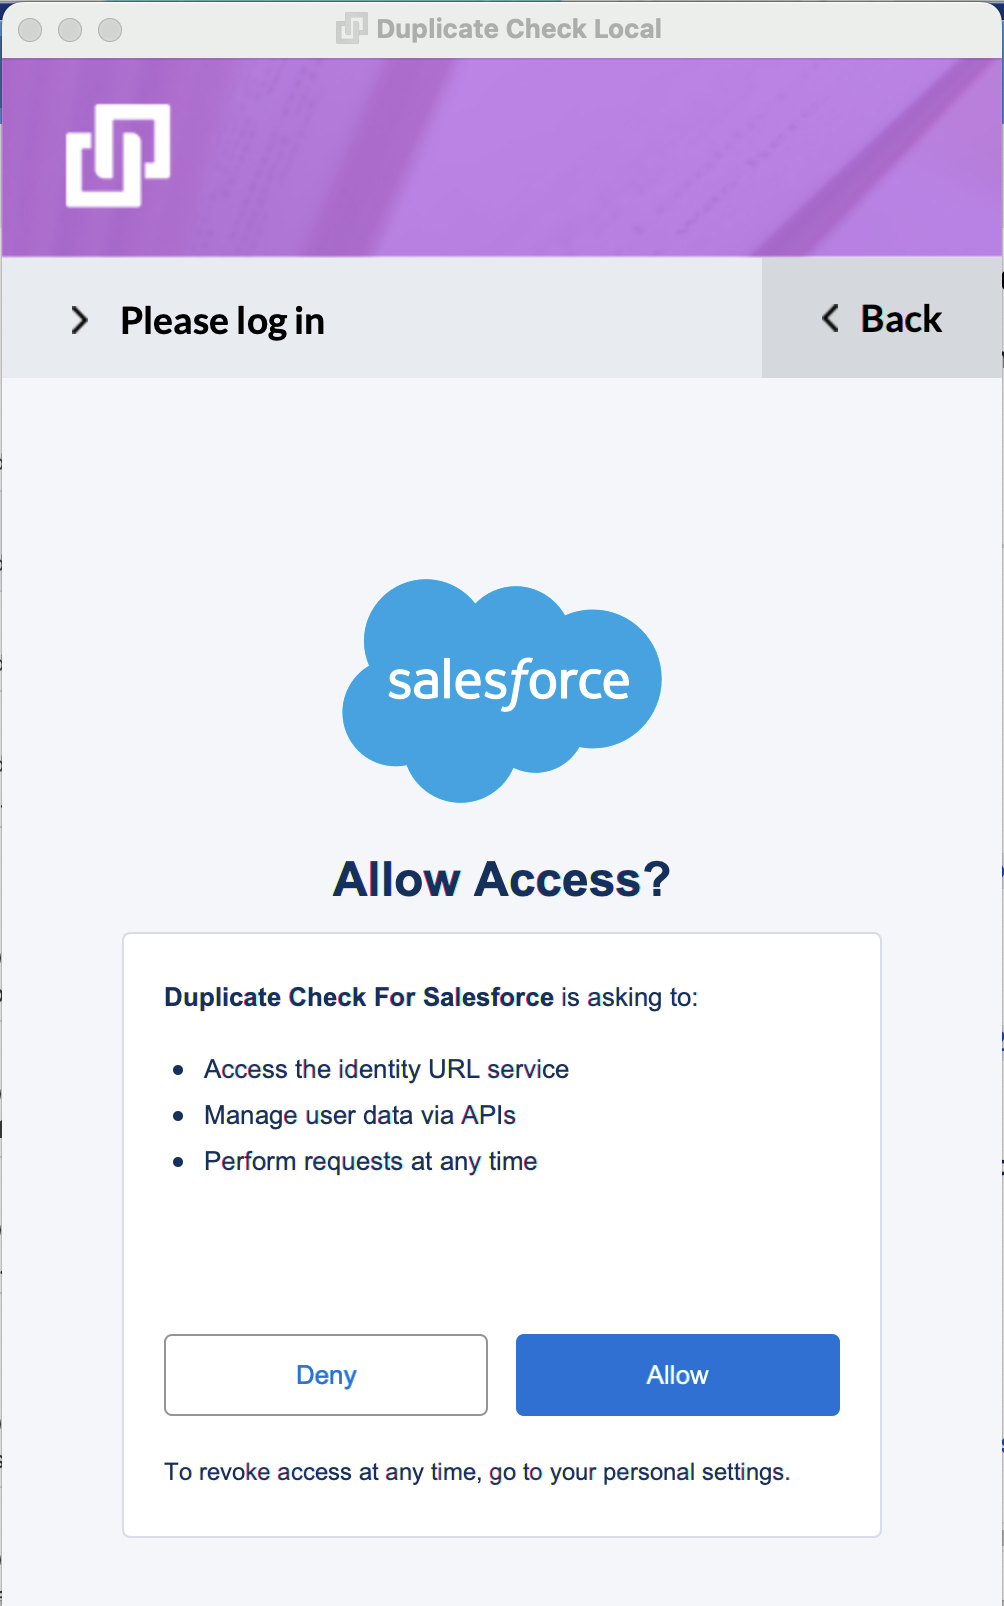
- Make sure that you grant DC Local access to perform the following actions: Access the identity URL Service, Manage user data via APIs, and Perform requests at any time. Otherwise, DC Local won't work.
- After a successful login, you will see the DC Local Job selection page
2. Send job to DC Local
- In your Salesforce environment, go to the DC Job tab.
- Click + New Job
 to create a new DC Job.
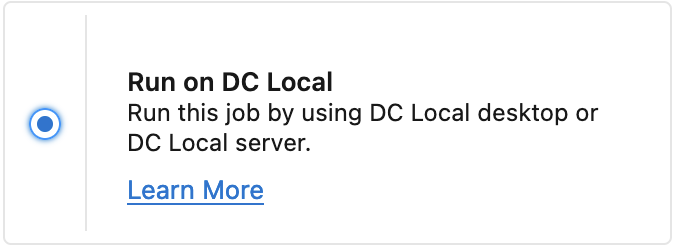
 - In step 3. "Processing Options", select Run on DC Local.
3. Find and run a job in DC Local
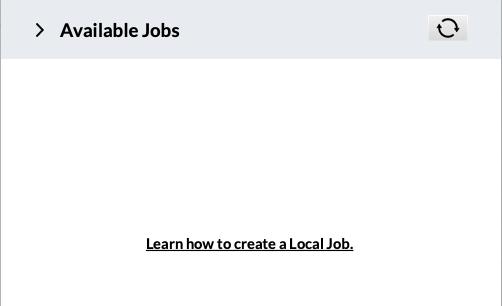
- Now the created job will be visible on the DC Local 'Available Jobs' panel and ready to be processed. Click Refresh
 if you don't see it straight away.
At the right of the job, click Select.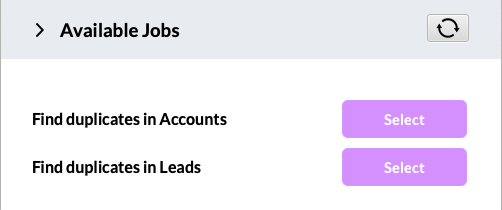
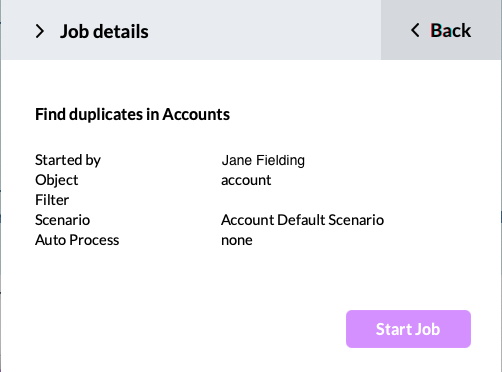
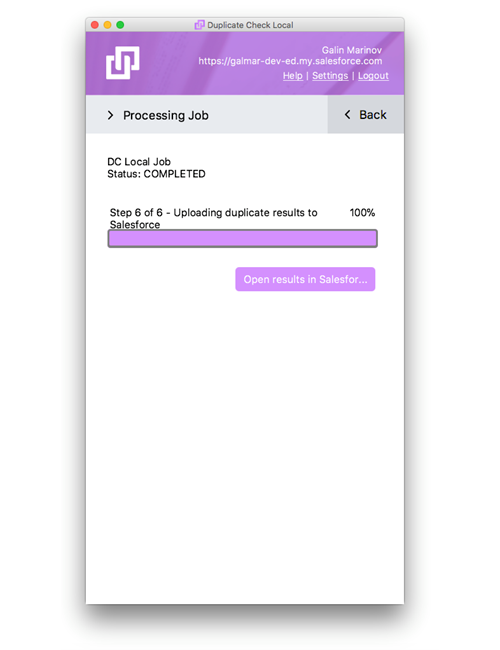
- Review the job details and click Start Job.
- When the job is finished, you will see a link that will lead you to the DC job results overview page in Salesforce. From there you can choose further actions, such as merging or converting the records.
- In DC Local, you can now click Back
 and start another job, or just close the program.
