In this article, you will learn how to save the validation results of Addresses, Emails, and Phone Numbers that were validated in a flow. For the validating itself, see articles Addresses, Emails, and Phone Numbers.
Step 1 Fill in API Field Name and Assign Variable
- Complete Step 1 till Step 3 from Flow Action - Validate Address when you want to save the validation results for the Address Field.
Complete Flow Action - Validate Email for the email fields and Flow Action - Validate Phone for the phone fields if you want to save the validation results for those type of fields. - Open the Screen Action and click on "RV - Validate Address".
- At "Field API Name" type the Street Field API Name that is mapped in RV Setup > Object > Address
Then the flow knows which address the results should be validated for.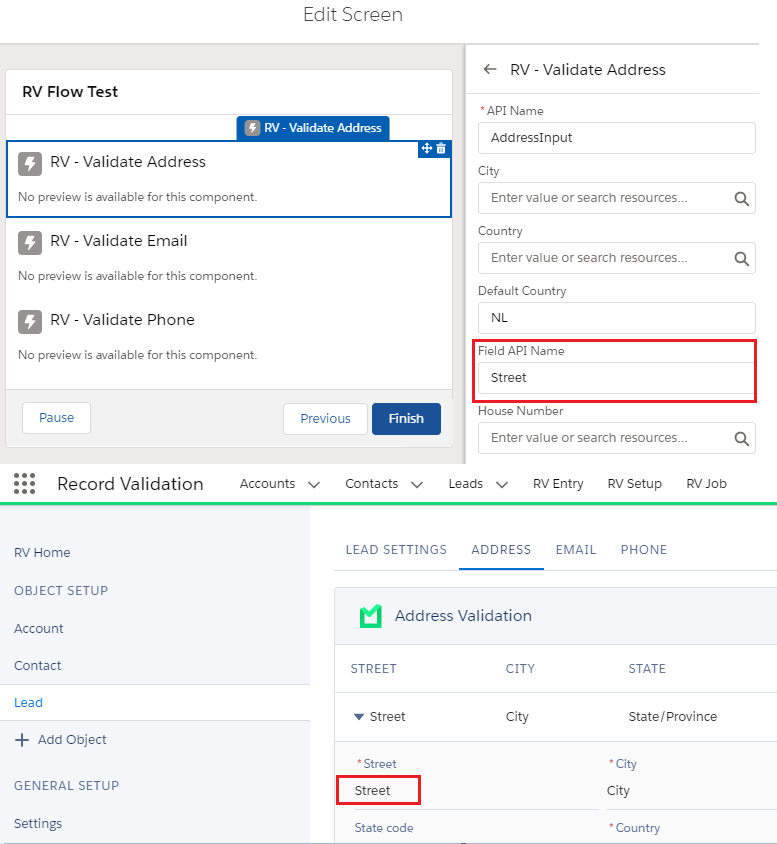
- Check the 'Manually assign variables (advanced)' checkbox.
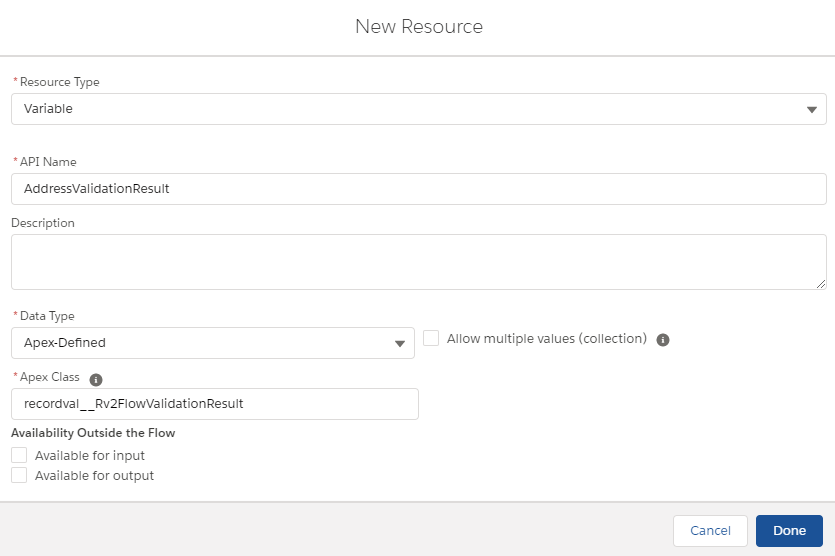
- At "Record Validation Result", click in the "Search variables" field and choose "+ New Resource".
- At "Resource Type", choose "Variable".
- At "API Name", define an API name for the new variable.
- At "Data Type", choose "Apex-Defined".
- At "Apex Class", choose "recordval__Rv2FlowValidationResult".
- Click Done.
- Repeat steps 1.1 - 1.10 to save the validation results for additional Address fields, Email fields, and Phone fields.
Step 2 Store all validation results in a new variable
The validation results from the RV - Validate Address, Email and Phone Action have to be stored in a variable to serve as input for the "RV - Save validation results" Action.
- Open the Lightning Flow Builder.
- From the Elements section, drag a new Assignment to the screen from the toolbox on the left side.

- At "Label", define a name for the assignment. If the API name is not set automatically, make sure an API name is defined as well.
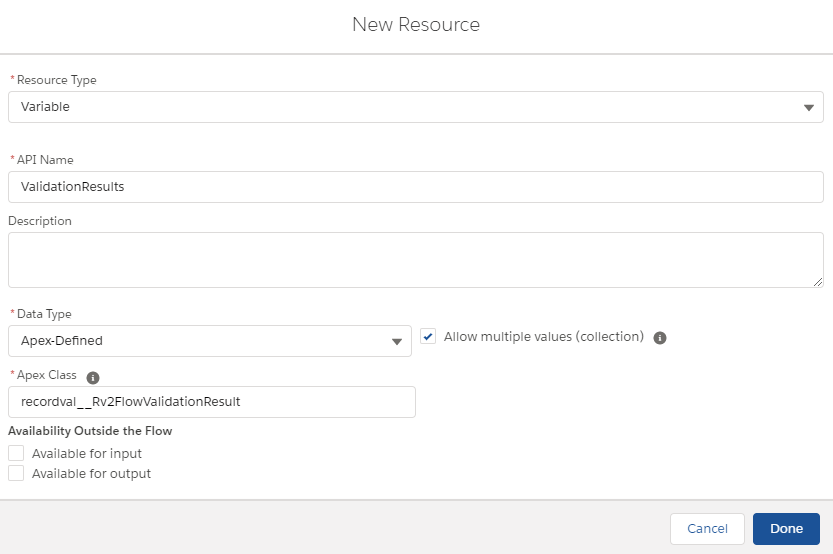
- At "Set Variable Values", click in the "Search variables" field and choose "+ New Resource".
- At "Resource Type", choose "Variable".
- At "API Name", define an API name for the new variable.
- At "Data Type", choose "Apex-Defined".
- At "Apex Class", choose "recordval__Rv2FlowValidationResult".
- Tick the checkbox "Allow multiple values (collection)".
- Click Done.
- Change the operator from "Equal" to "Add".
- At "Value", click in the "Enter value or search resource..." field and choose the Apex Defined Variable you created in Step 2.
- Click on "+ Add Assignment" if you want to store more apex defined variables.
- At "Variable", click in the "Search variables..." field and choose the same Apex Defined Collection Variable as in the first row.
- Change the operator from "Equal" to "Add".
- At "Value", click in the "Enter value or search resource..." field and choose the next Apex Defined Variable.
- Repeat step 3.13 till 3.16 until all Apex Defined Variables are added.
- Click Done.

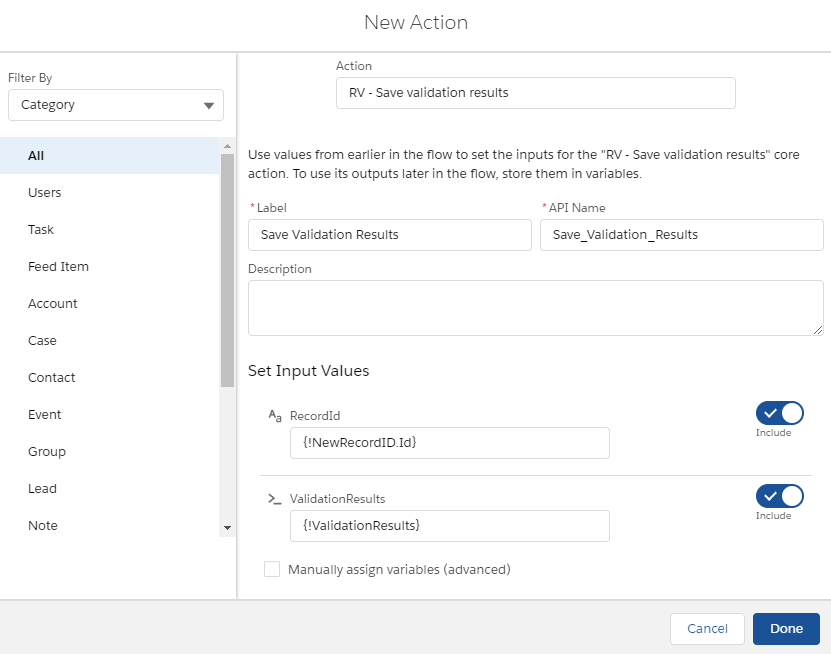
Step 3 Use the "RV - Save validation results" flow action
- From the Elements section, drag a new Action to the screen from the Toolbox on the left side.

- In the New Action dialog, search for RV - Save validation results.
- At "Label", define a name for your action. If the API name is not set automatically, make sure an API name is defined as well.
- At "RecordId", switch to "Include" and fill in the variable of the created record.
- At "ValidationResults", switch to "Include" and fill in the "Apex Defined Collection Variable".
- Click Done.
Step 4 Connect your actions to the start trigger
Make sure the Screen component, Assignment, and "Save Validation Results" action are connected to the start trigger.
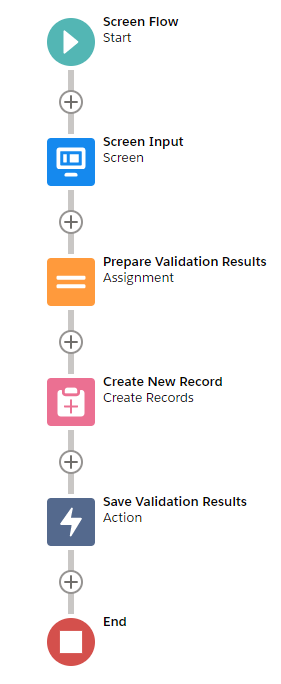
In this example, we're first gathering the field values in a screen. Values are then stored in a variable (assignment). A record is created and the variables from the assignment and the record Id are used as input for the "Save Validation Results" action.
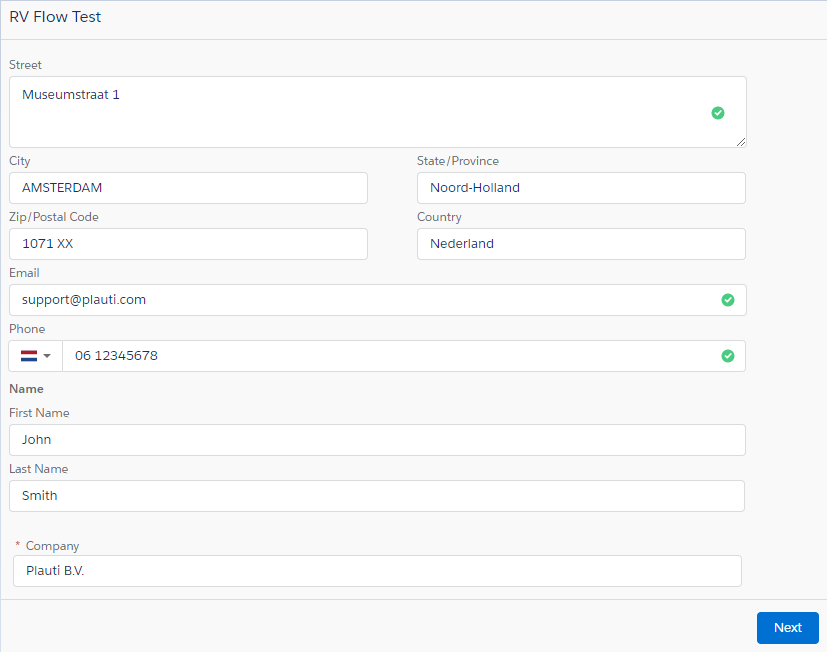
Step 5 Run the flow
Save the flow, give it a name and click "Run".
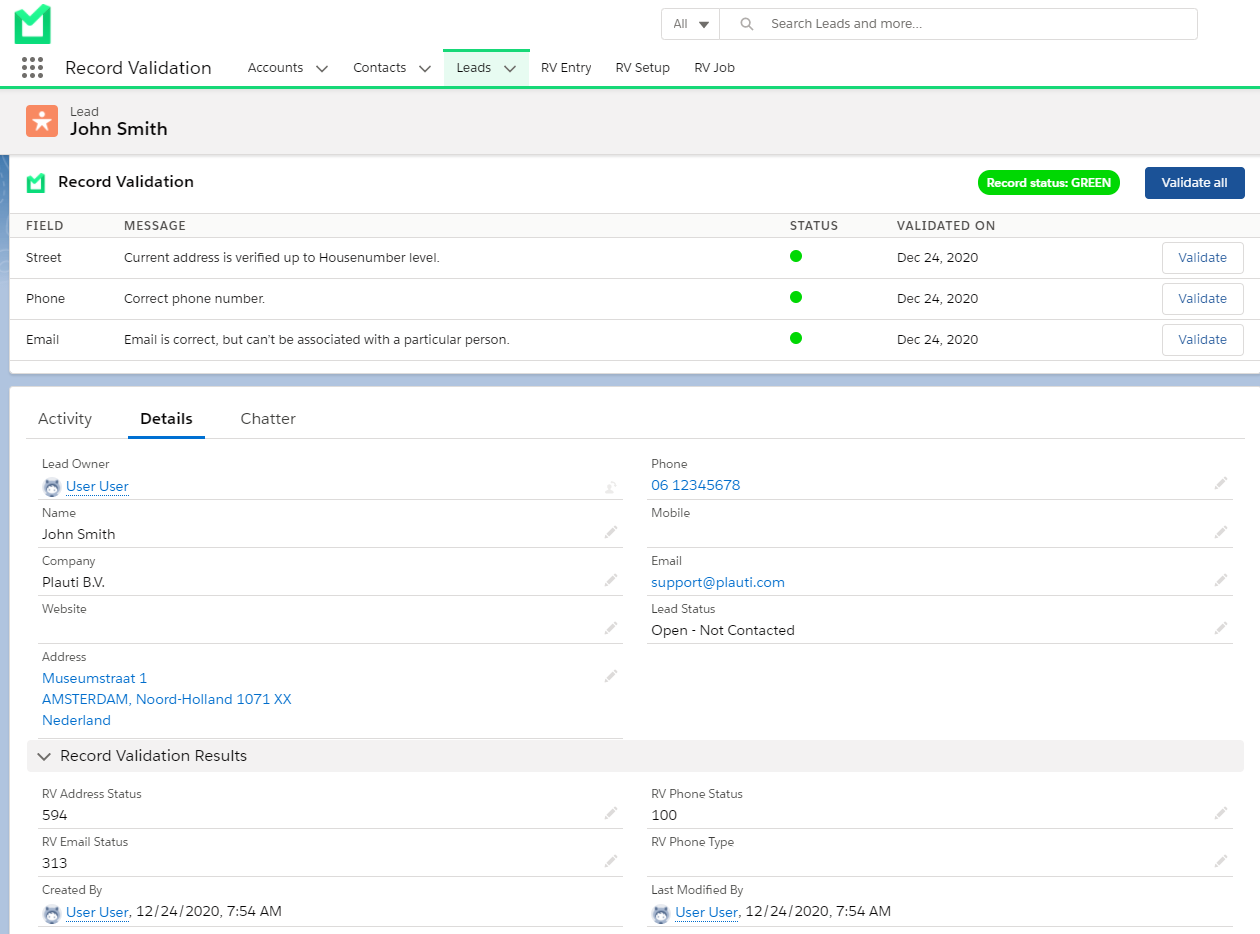
In the example below a lead is created where the address, email, and phone number are validated and formatted upon entry. The First Name, Last Name, and Company are filled in as well in the flow.
When the flow is finished, the record is created, and the validation results are saved: