How to use Validate Email in your flow
Step 1 Add the "Validate Email" Flow Action to your flow
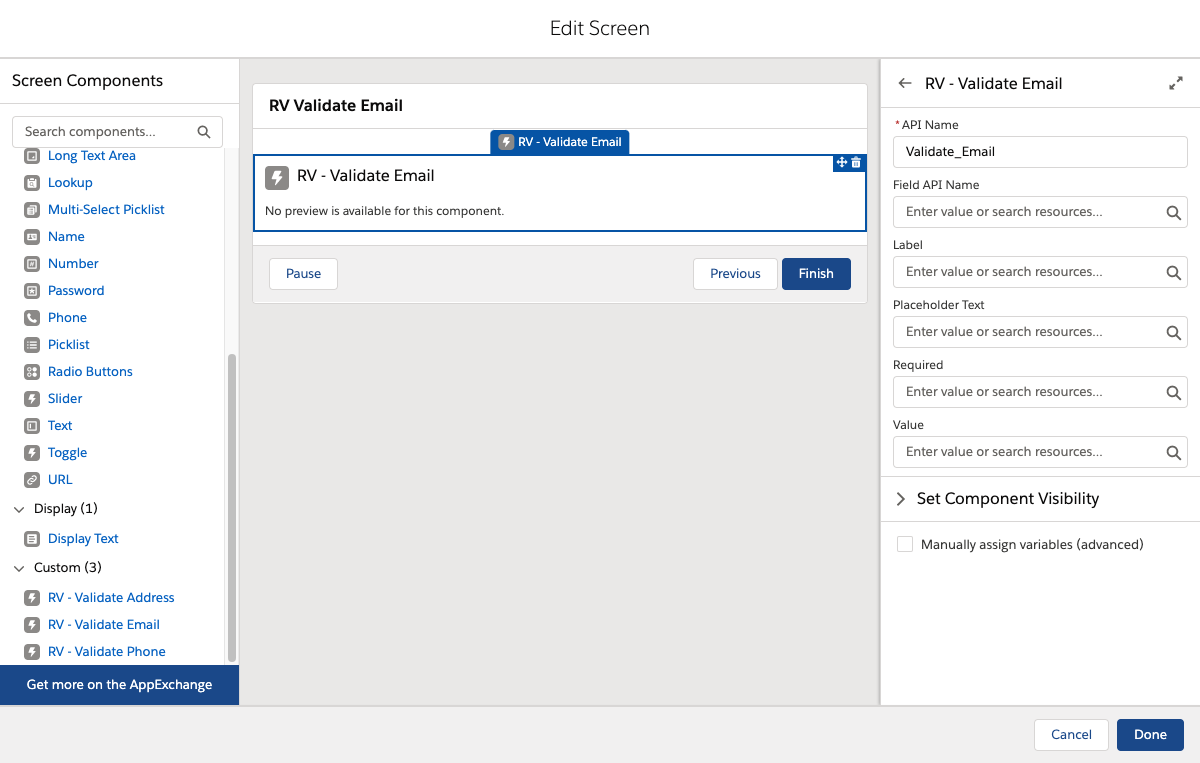
- Open the Lightning Flow Builder.
- From the Elements section, drag a new screen from the Toolbox onto the canvas.
.png)
- At "Label" and "API Name", define a label and an API name for the screen.
- From the Screen Components section, scroll down to Custom and drag the "RV - Validate Email" screen component onto the screen.
Step 2 Fill out the fields
- At "API Name", define an API name for the screen component. For example "Validate_Email".
- "Field API Name" is used for saving the validation results. Populate this field if you want to save the validation results.
- Optionally, fill out the other fields with variables or fixed values, or leave them blank.
- Click "Done".
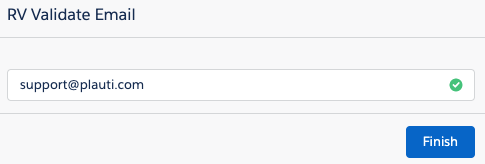
Example of the Validate Email Flow Component
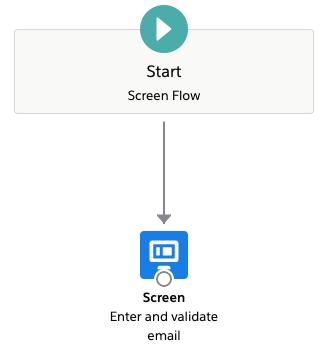
Step 3 Connect your screen to the Start trigger
Make sure the screen is connected to the Start trigger.
Step 4 Run the flow
- Save the flow, give it a name and click Run.
- Fill out the email address and Record Validation will validate it for you.