Getting access to running jobs
First, make sure you or your users have permission to run a DAP job.
- Go to DAP Setup > Action Library.
- Click Assignment
 at the action you want to use.
 - At your Profile or User, at Enable Action For, make sure the "Job" option is added.
Read more about granting permissions in The Action Library.
Running a DAP Job
Execute an action as a job as follows:
- In DAP, go to tab DAP Job.

- In the top right-hand corner, click + New Job
 .
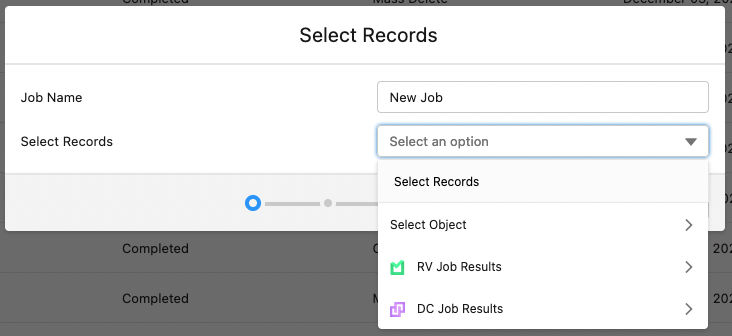
. - At Job Name, enter a job name.
- At Select Records, select the records you want to run an action on:
- Click Select Object to select an object you want to run an action on.
- Click RV Job Results to select results of a Record Validation Job to run an action on.
- Click DC Job Results to select results of a Duplicate Check Job to run an action on.
- Click Report to select results of a saved report. Read more here.
- Add a filter to apply the action to a selection of records (optional). Click + Add Filter
 , and enter a Field, Operator and Value to select on. For example, if you want to run an action on Accounts, you can enter Field: Shipping City, Operator: Equals, Value: Boston, to run the action on all accounts located in Boston.
Verify that the filter selected the correct records by clicking Preview Record Selection . Tailor the Preview Record Selection overview to your needs by adding or removing columns. Open records from the overview with the 'Open Record'
  icon to verify they are indeed the records you want to process.
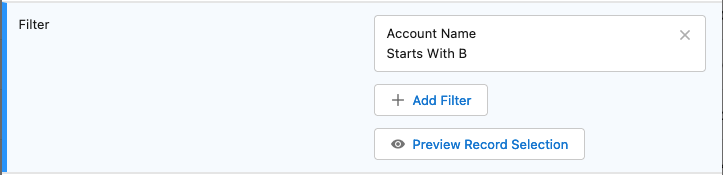
- If you add multiple filters you can add filter logic as well, to indicate how the filters should relate to each other. Click Add Filter Logic, and enter a filter logic formula using the filter numbers. For example, if you have three filters, (1 AND 2) OR 3 finds records that match both Filter 1 and Filter 2, or Filter 3. See the Salesforce Filter Logic page for more information.
- If you want to run this job repeatedly, you can schedule it. See Scheduling a DAP Job for more information. Note that jobs on RV or DC Job Results, or on Reports, cannot be scheduled.
- Click Next.
- Select the action you want to run and click Next.
- In the next window, set the action-specific settings. Enter values to add to records, toggle action options, etc. This is explained in more detail in the action-specific knowledge articles. Click Next.
- In the confirmation window, check the changes you will be making and click Start.
You will be taken to the Job Overview page, where you can track the job's progress.
Job Overview
After starting a job, you will be taken to the Job Overview page. Here you will see the job that you just started, with info such as when it was started and its current status.
To access the DAP Job Overview if you weren't forwarded there automatically, simply open the DAP Job tab at the top. If that opens the Scheduled Job Overview instead, click the downward arrow next to the Scheduled Job Overview title top left and select Job Overview.

The Job Overview shows all finished and running jobs, both single jobs and individual runs of scheduled jobs. If there are any jobs scheduled to run later today, these are announced at the top. 
Click Info  to view all details of a job: number of records processed, number of records succeeded or failed, the changes that were made to the records, etc.
Click Delete  to delete a job and its details.
A Scheduled Job icon  next to a Job's name indicates that it was a single run of a scheduled job. The Scheduled Job itself can be found on the Scheduled Job overview.
To switch between the DAP Job Overview and the Scheduled Job Overview, click the downward arrow next to the Job Overview title top left and select the other overview. 
